Server Settings
The Server Settings page enables you to configure the email and SMS servers for sending notifications from the product.
Email Server

To configure an email server, follow these steps:
- Specify the name and port number of the outgoing email server in the Mail Server & Port field.
- Specify the email address from which email notifications should be sent in the From Address field.
- To ensure secure communication, select TLS in the Use Secure Connections (SSL/TLS) drop-down.
- Select the authentication type from the provided options:
- Basic Authentication
- OAuth Authentication
- Basic Authentication:
- Enter the Username and Password used to access the email server. If your email server does not require authentication, leave these fields empty.
- Click Send Test Mail to verify the email server settings and validity of the email addresses.
- OAuth Authentication:
- Enter the Tenant Name, User Name, Application ID, and Secret Key as shown in the screenshot below. Your tenant name should be in the <org_name>.onmicrosoft.com format (e.g., zohocorp.onmicrosoft.com).
Note: To learn how to find the Application ID and Secret Key, follow these steps.

- You will be redirected to Microsoft 365 for authentication. Authorize using the same username provided during the configuration. This username must be linked to a mailbox.
- Click Save Settings.
Steps to create Azure application for mail server configuration:
- Open the Azure portal and click Microsoft Entra ID.
- Select App registrations from the left menu and click New registration.
- Enter a name of your choice and choose the supported account type. (Keep the default option selected).
- Under Redirect URI (optional), select Web as the platform and paste the following OAuth link: https://identitymanager.manageengine.com/api/public/v1/oauth/redirect
Alternately, you can add the localhost redirect API in the following pattern: protocol://localhost:port_number/context_if_any/RestAPI/WC/OAuthSetting e.g., http://localhost:8085/RestAPI/WC/OAuthSetting
Note: If you add the above localhost URI as the redirect URI, you must access the product from the machine where it is installed using the localhost URI (http://localhost:8085), to configure the email server.
- Click Register to create the application.

- From the left pane, click Certificates & secrets → New client secret.
- On the displayed page, provide a Description for the client secret, and specify the validity of the client secret under Expires. Click Add.
- You will find the client secret generated. Copy the string under Value. This is the application's Secret Key.

- From the left pane, navigate to the Overview page and copy the Application (client) ID.
SMS Gateway
You can configure SharePoint Manager Plus to use your own Global System for Mobile Communications (GSM) modem or a custom SMS gateway.
Prerequisites
Meeting these criteria allows SharePoint Manager Plus to support your modem or mobile phone.
- The modem or mobile phone must have GSM functionality with a provision to insert the SIM card.
- It should support 7-bit (GSM default alphabet), 8-bit, and Unicode (UCS2) encoding.
- Make sure the GSM modem configured with SharePoint Manager Plus is not used by any other application.
- Ensure the GSM modem is connected to the serial port of your machine using a serial cable.
Configuring GSM Modem
- Navigate to Admin → General Settings → Server Settings.
- Click the SMS Gateway tab.
- Select GSMModem from the SMS Provider drop down box.
- Specify the Modem Port Number. The port number for Windows devices should be in the COMx format (e.g., COM7 or COM8).
- Click Advanced Settings to specify the Modem Port Speed, Message Center Number, and SIM PIN Number.
- Click Save Settings.
Note: If you experience any issues in sending SMS notifications through GSM modem, restart SharePoint Manager Plus and try again.
Configuring a custom SMS provider
You can configure your own custom SMS gateway if the gateway is based on the following providers:
HTTP-based SMS provider
- Navigate to Admin → General Settings → Server Settings.
- Click the SMS Gateway tab.
- Select Custom from the SMS Provider drop-down.
- Select HTTP from the Send SMS via drop-down.
- Select whether you want to use the Post or Get HTTP method for sending SMS.
- Enter the HTTTP URL of your SMS gateway provider.
- Enter the HTTP Parameters specific to your SMS provider.
Note:
SMTP-based SMS provider
- Navigate to Admin → General Settings → Server Settings.
- Click the SMS Gateway tab.
- Select SMTP from the Send SMS via drop-down.
- In the From Address field, enter an email address from which you want to send the SMS (e.g., noreply@manageengine.com).
- In the To Address field, enter the %mobNo% macro followed by the email of your provider (e.g., %mobNo%@manageengine.com). Refer to your SMS provider to know the exact values.
- Enter the details required in the Subject field. Generally, it would either be a mobile number or a message depending on your SMS provider.
- Enter the details required in the Content field. This also depends on your SMS provider. Refer to them to know the exact values.
- Uncheck Use default mail settings to configure a custom SMTP server instead of the default one configured in the Email Server tab.
- Enter the name or IP address of the SMTP server and its port number in the SMTP Server/Port field.
- Enter the Username and Password of the SMTP server.
- Select TLS or SSL from the Connection Security drop-down.
- Click Save Settings.
SMPP-based SMS provider
- Navigate to Admin → General Settings → Server Settings.
- Click the SMS Gateway tab.
- Select Custom from the SMS Provider drop-down.
- Select SMPP from the Send SMS via drop-down.
- Enter the SMPP server name and its port number in the SMPP Server Port field.
- Enter the Username and Password of the SMPP server.
- Click Advanced Settings to configure the following options:
- Specify the SMPP Time-Out and SMPP Source Address.
- Enter the ESME System Type and select Bind Transmitter or Bind Transceiver from the ESME Bind Type drop-down.
- Select the Source Address TON (type of number), Source Address NPI (Numeric Plan Indicator), Destination Address TON, and Destination Address NPI from the respective drop-downs.
- Click Save Settings.
Proxy Server Settings
Follow the below steps to configure a proxy server in the product:
Enable proxy server
- Navigate to Admin → General Settings → Server Settings.
- Click the Proxy Settings tab.
- Select the Enable Proxy Server check box.
- Enter the server name or IP address and the port number of the proxy server in the Proxy Server/Port field.
- Enter the User Name and Password of the proxy server.
- Click Save Settings.

Disable proxy server
Follow the steps below to disable the proxy server:
- Navigate to Admin → General Settings → Server Settings.
- Click the Proxy Settings tab.
- Uncheck the Enable Proxy Server check box.
- Click Save Settings.

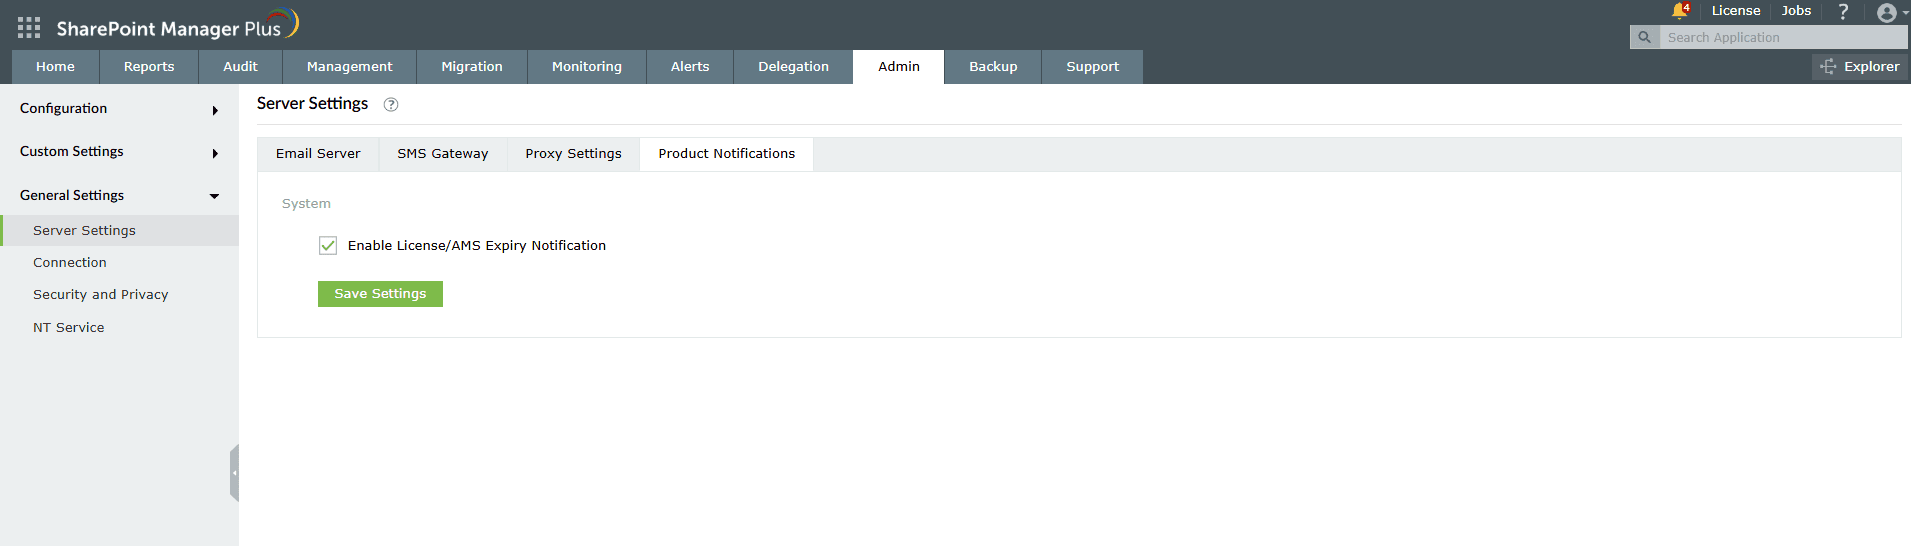
Product Notifications
Enable notifications to receive emails regarding license and Annual Maintenance and Support (AMS) expiration.
- Navigate to Admin → General Settings → Server Settings.
- Click the Product Notifications tab.
- Select the Enable License/AMS Expiry Notification checkbox and click Save Settings.
 ADManager Plus
 ADAudit Plus
 ADSelfService Plus
 SharePoint Manager Plus