Scheduling reports
SharePoint Manager Plus allows the administrators to automate their report generation by providing an option to schedule reports at periodic time intervals.
Steps to schedule a report
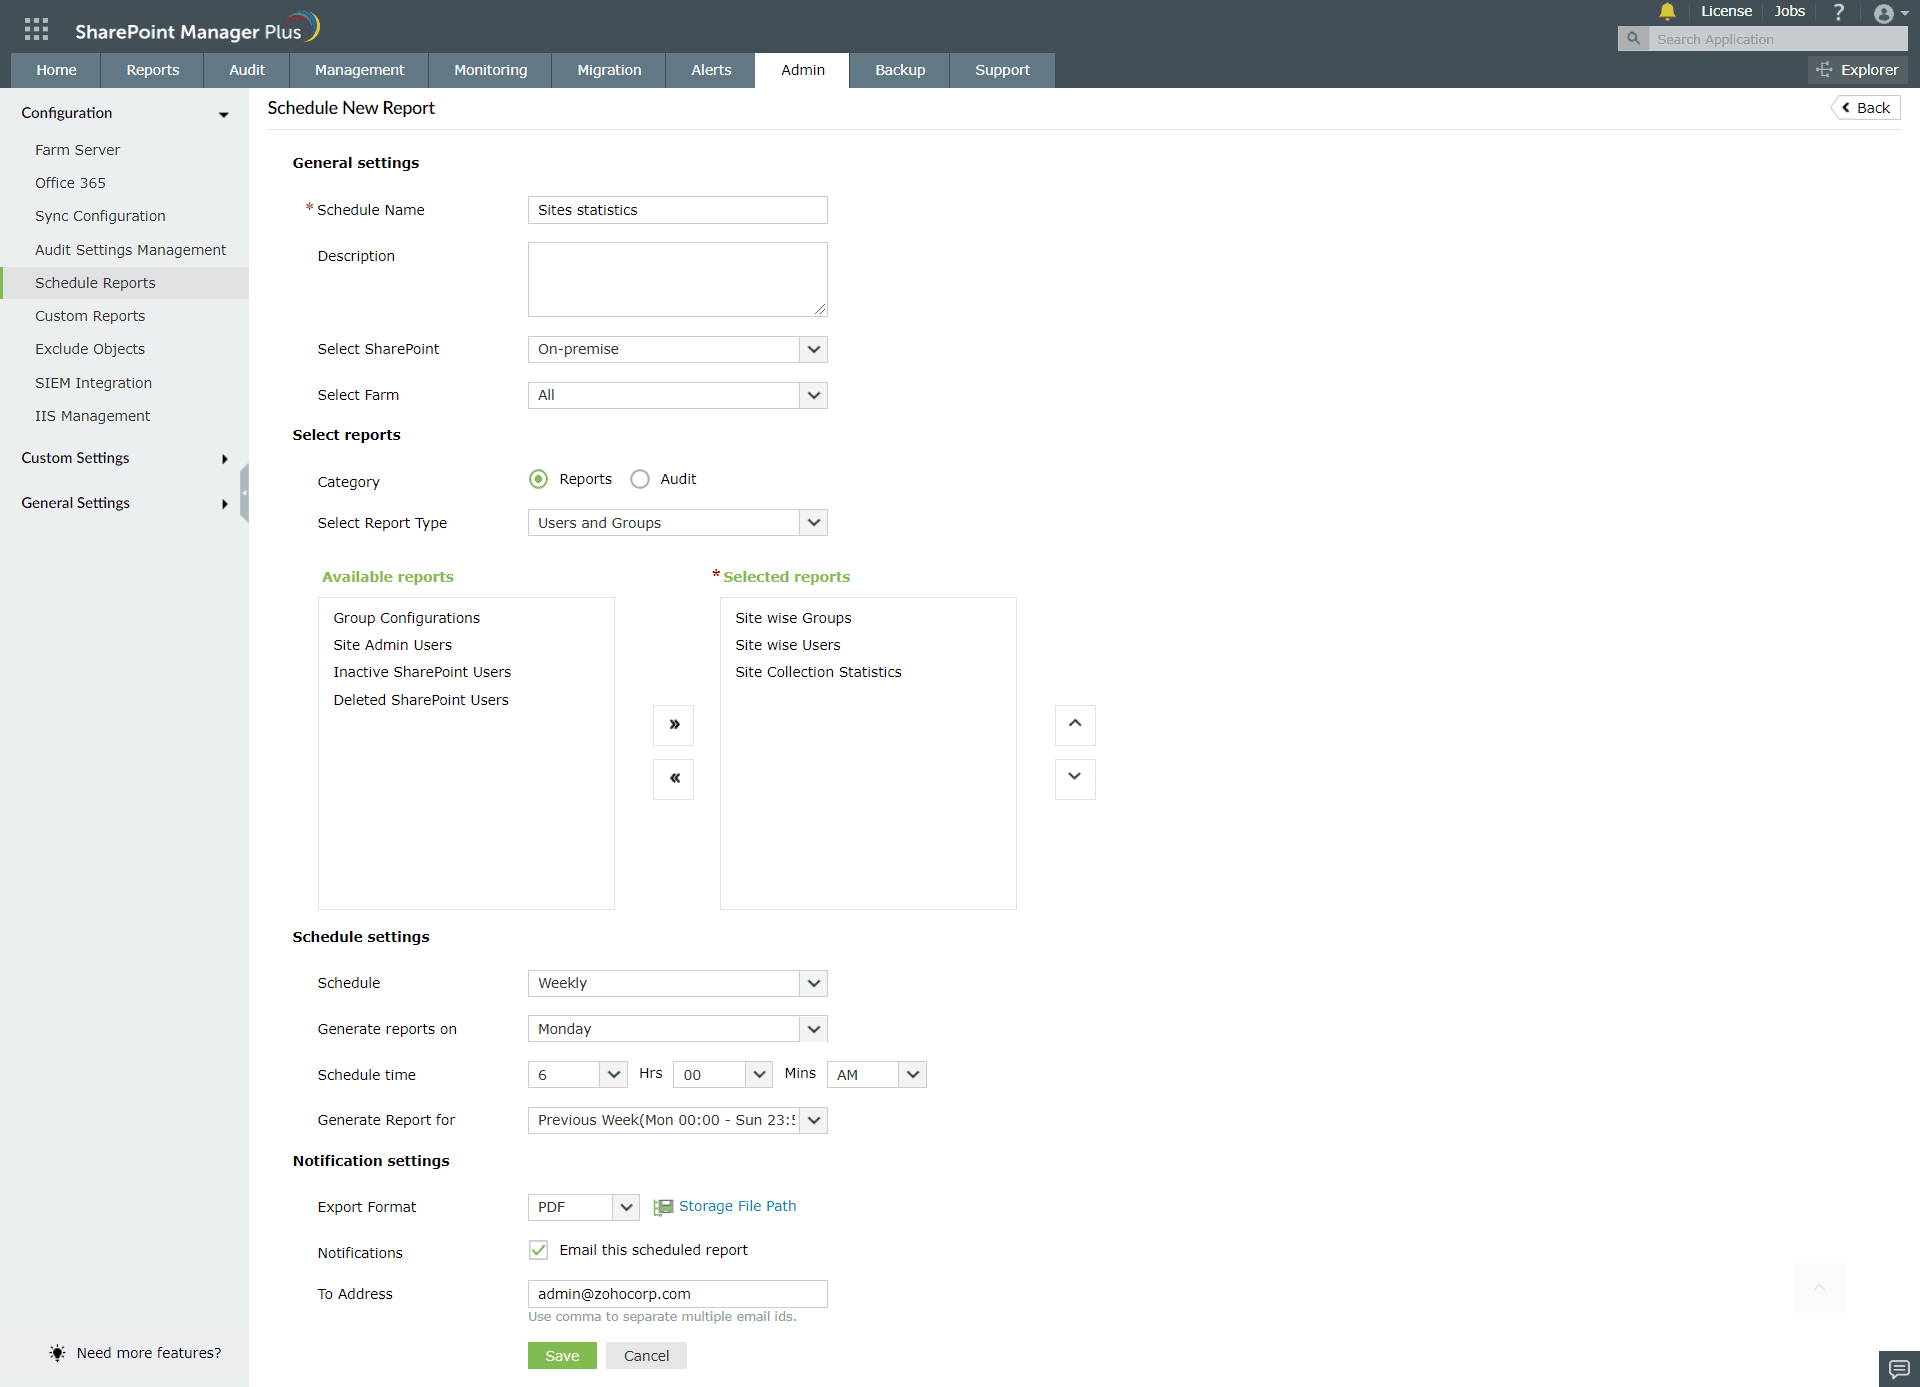
- Navigate to Admin > Configuration > Schedule Reports.
- In the Schedule Name field, provide a name for the report schedule.
- In the Description field, describe the report schedule.
- From the Select SharePoint drop-down, choose the SharePoint environment for which you want to schedule a report: Online (Office 365) or On-premise.
- From the Select Farm drop-down, select the farm.
- Under Select reports, choose the category.
- In the Select Report Type drop-down, choose the report type that you need to schedule.
- From the Available reports list, select the reports you need to schedule and move them to the Selected reports list.
- In the Schedule drop-down, choose the report generation frequency: Daily, Weekly, Monthly, or Custom. With Custom, you can generate reports on the last day of every month, or at regular intervals (for example, every N days at a specified time).
- From the Export Format drop-down, select the report format. SharePoint Manager Plus can generate reports in PDF, HTML, XLSX, and CSV formats.
- To redistribute the scheduled report via email, select Email this scheduled report and enter the recipient address in the To Address field. Use a comma to separate multiple email IDs.
- Click Save.
 ADManager Plus
 ADAudit Plus
 ADSelfService Plus
 SharePoint Manager Plus
 Previous Topic